We’ve long known the power of video—while social media posts with great images command much better engagement than simple text posts, video tops them all. And live video is even more engaging! If this is something that scares the pants off of you, for heaven’s sake, pull up your pants and read our tips. It’s really pretty easy and fun!
Why Video?
Video is so powerful because it allows people to relate to you and what you’re doing better than still images. Add that to the fact that many people are visual learners, and you’ll understand pretty quickly why video is an amazing social media tool. For garden communicators, live video can be used for things like:
- A garden tip of the day/week/month
- A stroll through your garden
- A quick DIY or how-to
- Important announcements (new book, an event you’ll be hosting, a venue you’ll be speaking at)
- More in-depth video like a live stream, an interview, or an event
In this blog post, we’ll talk about live video you can do on Facebook, with our next blog post focusing on live video for Instagram.
Note: We can hear many of you cringing and thinking, “Live video? I could never do that! I’d be too anxious!” We hear you. We do. Mostly it’s the fear of tech going wrong or not knowing what the best practices are, but that’s why we’re here to help.
Facebook Live Video
You can use Facebook Live video in one of your groups, your business page, or your personal page, and on your phone or your desktop computer. Here’s a quick how-to along with some of our best tips:

- Go to the page or group where you want to host the live video. Hit “Live Video” under the “What’s on your mind?” question.
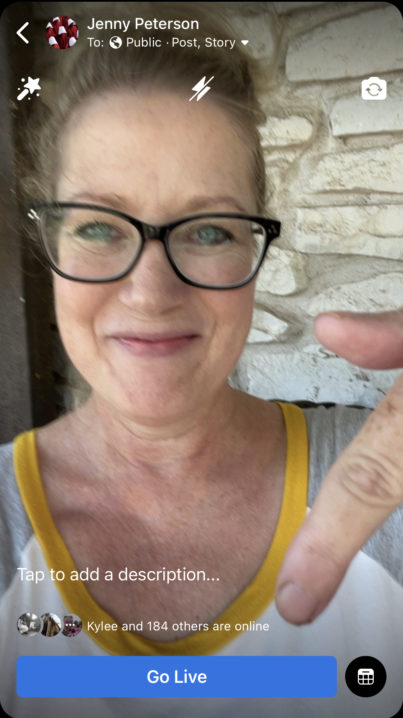
- Look for the “Tap to add a description” link and that’s where you, well, tap and add a description. Let your viewers know what you’re going live about, aka “Join me in a Saturday Sip & Stroll through the garden—grab your glass of vino and let’s go!”
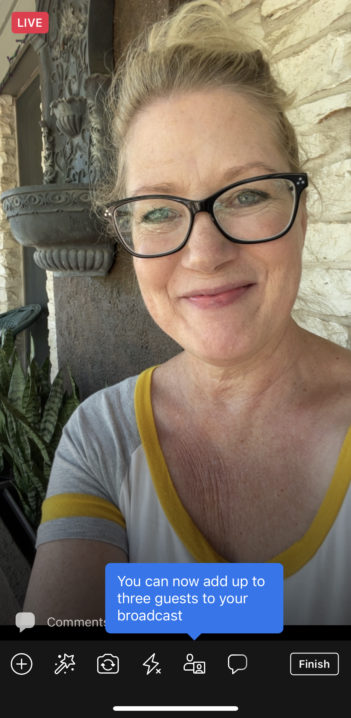
- Add any other feature from the icons at the bottom—you can add a link (to your email sign up list?), ask people to DM you, add a friend into the video, raise money for a charitable cause, or check in at your location.
- Then hit the “Go Live” blue bar down at the bottom of your screen.
- When you’re done, hit “Finish” on the bottom right of your screen, follow the prompts to save or delete, and you’re done!

Tips for Going Live
- Choose horizontal or vertical orientation. If you’re on your phone, you can hold your phone horizontally (landscape mode) or vertically (portrait mode), but once you get going, don’t change the orientation of your phone. It’ll just turn the screen sideways for your viewers and will look odd and awkward.
- Use a tripod if you’re using your phone and want to video a how-to that requires both hands. Otherwise, if you’re pretty good holding your phone in one hand while talking (and it’s intended to be a more informal video), no tripod is needed.
- Make sure your Wi-Fi connection is strong. If it’s not, your live video will cut in and out, which is frustrating for everyone. If you totally lose your connection, simply end your video and start again—and humor is your friend here! Just say, “Oops, live means live, let’s try this again!” and keep going. It’s not a big deal and has happened to everyone.
- Chit chat for a minute at first. It takes people a minute or two to find you and watch, so rather than going straight into your topic, say, “Hey, this is Jenny going live about XYZ from my garden! We’re going to wait just a minute for people to show up, then we’re going to dive right in.” Then chit chat before introducing your topic. Don’t take too long here—people will come and go during your video, but you do want to give them a few seconds to join you.
- If it’s a longer video, reintroduce the topic once or twice. Simply state, “For those of you just joining, we’re talking about XYZ today and right now I want you to take a look at…”
- Interact with your audience! This is why live video is so fun. Keep one eye on the comments, greet people as they show up (particularly as you’re getting going), ask for questions, and use people’s names.
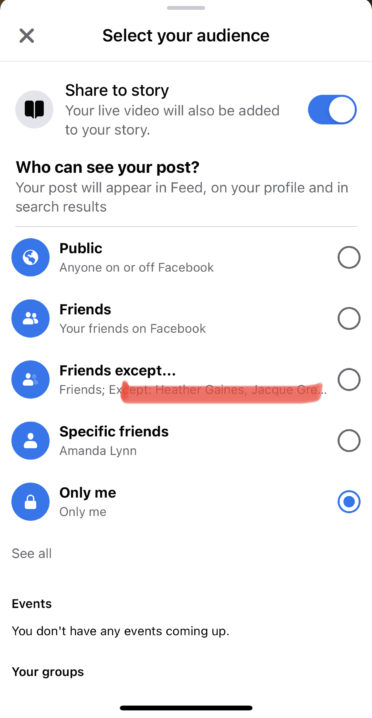
- Practice by yourself. Right after you click “Live Video,” you’ll see an opportunity to select the audience you want for your live video directly under your name at the top of the screen. Click on the drop-down arrow and then select “Only me” at the bottom of the list. Now you can practice going live without anyone seeing you! Practice until you’re familiar with the settings and all the options, and you’re ready to confidently do your first real live video on Facebook for a wider audience.


